About Me

- darkly dreaming
- Hello! I'm Crystal, aka darkly dreaming. I'm 34 and live in the Midwestern USA. I've been back into PSP since November of 2010. Prior to that I tried PSP for about a year back in 2005 or 2006. I've just recently begun trying my hand at tutorials. If you try one of my tuts and would like to show me what you made, please email me at darklydreaming33@hotmail.com. Happy Tagging!
I CT For


Forums I Haunt

Blogs I Follow


Sunday, October 30, 2011
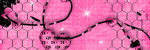
 Naughty Kitten

This tutorial was written by me on 10/30/11.
Any resemblance to other tutorials is a coincidence.
Any resemblance to other tutorials is a coincidence.
Click on image to see full size.
Supplies:
1) Tube of Choice. I'm using one called "Kitten" by Keith Garvey. This is a PTU tube, which can be purchased at PTE.
2) Scrapkit of Choice. I'm using the PTU kit Cute Kitty by Addictive Pleasures, which you can get at dreams-n-digital.
3) Missy Tag Template#356, available here.
4) Mask of choice. I used WeeScotsLass Mask 297, available here.
5) Font of Choice
Plugins:
1. Eye Candy Gradient Glow
2. Xero, Porcelain
Let's get Started....
1) Open Template. Duplicate (shift d) and close original.
2) Delete Copyright layer.
3) Change Canvas size to 700x650.
4) Open Paper 4. Copy and paste as new layer. Send to bottom. Apply our Mask. Merge Mask Group. Resize by 105%.
5) Select Frame 2 background. Select All, Float, Defloat. Open Paper 5. Copy and paste as new layer. Selections Invert, delete. Select none.
6) Select Frame 2 background again. Select All, Float, Defloat. Open tube, copy and paste as new layer. Selections Invert, delete. Select None. Duplicate. On bottom layer, change blend mode to Luminance (L). On top layer, change blend mode to Hard Light and lower opacity to 77.
7) Delete Original Frame 2 Background Layer.
8) Repeat Steps 5-7 on Frame 1 Background Layer.
9) Select Circle layer. Select All, Float, Defloat. Open Paper 6. Copy and paste as new layer. Selections Invert, Delete. Select none. Apply Gradient Glow with Settings 5, 0, 100, Fat (First Color Black, Second Color #ff5fa6. Add drop shadow of choice.
10) Select Circle Layer again. Select All, Float, Defloat. Open Close up tube, copy and paste as new layer. Selections Invert, delete. Select None. Duplicate. On bottom layer, change blend mode to Luminance (L). On top layer, change blend mode to Hard Light and lower opacity to 77.
11) Delete original Circle layer.
12) Select Frame 3 Background Layer. Select All, Float, Defloat. Open Paper 7. Copy and paste as new layer. Selections Invert, Delete. Select None.
13) Select Frame 3 Background Layer again. Select all, Float, Defloat. Open tube, copy and paste as new layer. Selections Invert, Delete. Duplicate. On bottom layer, change blend mode to Luminance (L). On top layer, change blend mode to Hard Light and lower opacity to 77.
14) Select Frame 3. Select All, Float, Defloat. Open Paper 2. Copy and paste as new layer. Resize by 75%. Selections Invert, delete. Select None. Apply our previous gradient glow.
15) Delete original Frame 3 layer.
16) Repeat Steps 13-14 on frame 1 and frame 2 layers.
17) Select heart layer. Select All, Float, Defloat. Open Paper 11. Copy and paste as new layer. Selections Invert, delete. Select None.
18) Delete original heart layer.
19) Select Glittered heart layer. Apply our gradient glow.
20) Select Filmstrip background layer. Select All, Float, Defloat. Open Paper 11. Copy and paste as new layer. Selections Invert, delete. Select None.
21) Delete original filmstrip background layer.
22) Select Filmstrip layer. Select All, Float, Defloat. Open Paper 8. Copy and paste as new layer. Resize by 90%. Selections Invert, Delete. Select None. Apply gradient glow.
23) Delete original Filmstrip layer and PawPrints Layer.
24) Delete naughty lil kitty layer.
25) Use your magic wand tool, click inside the right square on the frame. Selections Modify, Expand by 4. Copy close up tube as new layer. Selections Invert, Delete. Repeat on the other 2 frame squares. Merge all 3 tube layers together. Duplicate. On bottom layer, change blend mode to Luminance (L). On top layer, change blend mode to Hard Light and lower opacity to 77.
26) Open main tube. Copy and paste as new layer. Duplicate. On top layer, apply Xero, Porcelain. Change blend mode to soft light. Apply drop shadow of choice to bottom layer.
27) Open Scattered bling. Copy and paste as new layer. Resize by 80%. Add drop shadow of choice. Duplicate and arrange.
28) Open Sparkles. Copy and paste as new layer at the top. Duplicate, Image Mirror. Merge down. Duplicate, pull down more. Duplicate a third time, pull down to the bottom.
29) Bring our tube layers to the top.
30) Open buckle ribbon. Copy and paste as new layer. Resize by 85%. Add drop shadow. Arrange below our main tubes at the bottom.
31) Open heart charm. Copy and paste as new layer. Resize by 50%. Add drop shadow.
32) Open bow 2. Copy and paste as new layer. Resize by 30%. Add drop shadow.
33) Merge bow and charm layers together. Duplicate, Image mirror.
34) Open bowl. Copy and paste as new layer. Resize by 50% then again by 70%. Add drop shadow.
35) Open fluffyball. Copy and paste as new layer on bottom right just above our mask layer. Duplicate, Image mirror.
36) Resize if you want. Then add your copyright info + name and export .png.
Thanks for trying my tut!
Rockalicious

This tutorial was written by me on 10/30/11.
Any resemblance to other tutorials is a coincidence.
Click on image to view full size.
Any resemblance to other tutorials is a coincidence.
Click on image to view full size.
Supplies:
1) Tube of Choice. I'm using one called "Rockalicious" by Ismael Rac. This is a PTU tube, which can be purchased here.
2) Scrapkit of Choice. I'm using the PTU kit Rock Me by Scrap It Studio.
3) Creative Misfits Word Art by Kristin (Rock Word Art 3) available here.
4) WSL Mask351 available here.
5) Font of Choice.
Plugins:
1) Eye Candy Gradient Glow
2) Xero, Radiance
Let's get Started....
1) Open new canvas size 750x700, transparent.
2) Open Paper 11. Copy and paste as new layer. Resize by 120%. Apply our mask. Merge mask group. Apply Eye Candy Gradient Glow with settings 5, 25, 100, medium, white.
3) Open element 7. Copy and paste as new layer. Resize by 120%. Add drop shadow of choice.
4) Take your magic wand tool and click inside the frame. Selections, modify, expand by 4. Open paper 31. Copy and paste as new layer. Selections Invert, delete. Select none. Drag paper layer underneath frame.
5) Click inside frame again with magic wand. Expand selection by 8 this time. Open close up tube, copy and paste as new layer. Selections invert, delete. Select none. Drag tube layer underneath frame. Duplicate. Change blend mode on top layer to hard light and lower opacity to 73. Change blend mode on bottom layer to Luminance (L). Add drop shadow of choice to bottom layer.
6) Resize tag by 90%.
7) Open main tube, copy and paste as new layer. Duplicate. On top layer apply Xero, Radiance with settings: 222, 194, 49, 197. Adjust, gaussian blur with setting of 3. Change blend mode to Overlay. Lower opacity to 75. Add drop shadow of choice to bottom tube layer.
8) Open element 41. Copy and paste as new layer at top left. Duplicate, Image Mirror. Merge the two layers down. Duplicate, Image flip. Merge the two layers down. Send layer to bottom.
9) Open element 137. Copy and paste as new layer. Image free rotate right 45. Image resize by 80%.
10) Use your magic wand and click inside each of the blank squares inside the frame. Selections modify, expand by 4. Open paper 15. Copy and paste as new layer. Selections Invert, delete. Select none. Drag paper layer under the frame.
11) Use magic wand again as in step 10 and either separately or all at once, depending on what look you want, Use your close up tube inside the frames and drag under the frame layer. If you did separate, merge all the individual tube layers together. Then duplicate your tube layer. Change bottom layer blend mode to Luminance(L). Change top layer to Hard Light and lower opacity to 77.
12) Add drop shadow of choice to the frame layer.
13) Open element 37. Copy and paste as new layer. Image mirror. Image free rotate Left 35. Add drop shadow of choice. Arrange at the bottom underneath our main tube layers.
14) Open element 102. Copy and paste as new layer underneath our guitar. Duplicate, Image mirror and pull over to right beside it. Merge the layers down together. Add drop shadow. Add noise, Uniform 30%, monochrome checked.
15) Open word art. Copy and paste as new layer. Adjust, hue/saturation, colorize with settings 252, 255. Image resize by 75%. Add drop shadow of choice.
16) I resized my canvas a bit to 673x662 to give me room for copyright + name.
17) Add your copyright + name. Export your .png.
Thanks for trying my tut!
Saturday, October 29, 2011
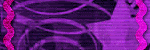
Rock Me Baby

This tutorial was written by me on 10/29/11.
Any resemblance to other tutorials is a coincidence.
Click on image to view full size + animation.
Any resemblance to other tutorials is a coincidence.
Click on image to view full size + animation.
Supplies:
1) Tube of Choice. I'm using one called "Rock Revolution 2" by Ismael Rac. This is a PTU tube, which can be purchased here.
2) Scrapkit of Choice. I'm using the PTU kit Rock Me by Scrap It Studio.
3) Missy Tag Template 417, available here.
4) Vix BigMask019 available here.
5) Novasparks animation by Missy here.
6) Font of Choice.
Plugins:
1) Eye Candy Gradient Glow
2) Xero, Radiance
3) Vanderlee UnpluggedX, Interlace
4) Xenofex2, Constellation
Let's get Started....
1) Open Template. Duplicate (shift d) and close original.
2) Delete Copyright layer.
3) Image, Canvas Size, 775x700, align Center (both vertical and horizontal)
4) Open Paper 7. Copy and paste as new layer. Resize by 120%. Send to bottom. Apply our mask. Merge mask group. Resize by 120%.
5) Select the Circle Layer. Select All, Float, Defloat. Open paper 6 copy and paste as new layer. Selections Invert, delete. Select none. Add drop shadow of choice.
6) Select Circle Layer Again. Select All, Float, Defloat. Open close up tube. Copy and paste as new layer. Selections Invert, delete. Change blend mode to Luminance (L).
7) Delete original circle layer.
8) Repeat Steps 5-7 on Frame Back and Raster 18 Layers. Only Leave blend mode at Normal and lower opacity to 76.
9) Select Circle Back layer. Select All, Float, Defloat. Open Paper 4. Copy and paste as new layer. Selections Invert, delete. Select none. Add drop shadow of choice. Add Noise 40% Uniform, monochrome checked. Apply Gradient Glow with settings: 5, 0, 100, fat (both colors black).
10) Delete original Circle Back layer.
11) Select Center Rectangle layer. Select All, Float, Defloat. Open Paper 19. Copy and paste as new layer. Selections Invert, delete. Select none. Apply Vanderlee UnpluggedX, Interlace with default settings. Apply Gradient Glow with previous settings.
12) Delete original Center Rectangle Layer.
13) Select Frame Layer. Select All, Float, Defloat. Open Paper 18. Copy and paste as new layer. Selections Invert, delete. Select None. Apply previous Gradient glow.
14) Delete original frame layer.
15) Repeat Steps 13 and 14 on small rectangle layer.
16) Select Rectangle Layer. Select All, float, Defloat. Open Paper16. Copy and paste as new layer. Resize by 120%. Selections Invert, delete. Apply our Gradient glow. Move down a bit.
17) Delete original rectangle layer.
18) Delete rectangle back layer.
19) Select thin rectangle left layer. Select All, Float, Defloat. Open Paper 9. Copy and paste as new layer. Selections Invert, delete. Adjust, Add noise with settings from before.
20) Delete original thin rectangle left layer.
21) Repeat Steps 19 - 20 on thin rectangle right layer and thin rectangle center layers.
22) Select rectangle layer. Select All, Float, Defloat. Open Paper 18. Copy and paste as new layer. Selections Invert, delete. Select none. Add gradient glow.
23) Delete original rectangle layer and rectangle back layer.
24) Select Star 1. Select All, float, Defloat. Add New Raster Layer. Flood fill with color #71141f. Apply Xenofex2, Constellation with settings: 3.7, 25, 4, 5, 100, 75, 45, keep original image. Apply Gradient Glow with settings 3, 0, 100, Thin, White.
25) Delete original Star 1 layer.
26) Repeat Steps 24-25 on Star 2.
27) Move the stars where you want them.
28) Select stars layer. Add our thin gradient glow.
29) Resize tag by 90%.
30) Open main tube. Copy and paste as new layer. Duplicate. On top layer, apply Xero, Radiance. Change blend mode to soft light and lower opacity to 67. On bottom layer add drop shadow of choice.
31) Select your text tool. Type out Rock me Baby a few times in font of choice. Apply Mura Meister copies: H-tile (line), Behind, Bg color Black, 22, -8, 100, 0, 0, 0, 100, 100, 0, 0, 0, 30, 0.
32) Select our rectangle layer. Select All, Float, Defloat. Selections Invert. Click on our text layer, hit delete. Select none. Drag our text layer underneath main tube layers.
33) Open Element 124. Copy and paste as new layer. Resize by 65%. Apply gradient glow, 3, 0, 100, thin, black.
34) Open Element 140. Copy and paste as new layer just under our close up tube in the middle circle. Duplicate and pull over more. Merge the two layers down. Select our circle background layer. Select All, Float, Deflaot. Selections Invert. Select the glitter merged layer. Delete. Change glitter layer blend mode to screen.
35) Open element 83. Copy and paste as new layer. Add drop shadow of choice. Duplicate, Image mirror. Arrange where you want on your tag.
36) Open element 21. Copy and paste as new layer. Resize by 60%. Apply gradient glow thin, black.
37) Open element 23. Copy and paste as new layer. Resize by 60%. Image free rotate left by 45. Apply gradient glow.
38) Open element 37. Copy and paste as new layer. Resize by 80%. Image free rotate left by 60. Add drop shadow.
39) Open element 40. Copy and paste as new layer under our main tube layer. Resize by 50%. Change blend mode to Color (L).
40) Open element 117. Copy and paste as new layer. Resize by 50%. Add gradient glow.
41) Resize here if you want to, then add your copyright info + Name (if you're going to make more than 1 tag, just do your copyright info now. That way you can save a blank animated tag and make it easier on yourself to add additional names).
Now let's animate....
42) Open the novasparks animation in Animation shop.
43) Back in PSP, Edit copy, merged.
44) Back in animation shop, paste as new animation. Go to animation properties, and pick opaque, black to give us a background (we need due to our mask layer).
45) Right click on our tag and click Insert Frames, From Empty. 14, 2, 10, carry forward contents of preceding frame. Leave all frames selected.
46) Click on the novasparks animation. Ctrl A. Make sure you are on Frame 1 of it, and drag over to Frame 1 of our tag and place at the bottom right. Then go back to the novasparks animation and hit ctrl z. Make sure all frames are selected, and drag from frame 1 of it to frame 1 of our tag (with all frames selected on it too) and place in the middle of the close up tube.
47) View animation. If you're happy with it, Save as a .mng so you can add your name and others (if you didn't already had your name). If you have your name already, go ahead and save as .gif.
48) If you need to add a name, go back to the tag in animation shop. Add your name as you normally would. Then when happy with it, copy just that layer and come into Animation shop. Paste as a new image. Repeat step 45 above on your name, so that it has 15 frames. Then Make sure to select all layers on the name, and all layers on the tag, and drag from Frame 1 of name to Frame 1 of tag and release where you want your name to be. View animation and if happy, save your .gif.
Thanks for trying my tut!
Sunday, October 23, 2011
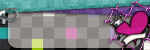
I Don't Have An Attitude

This tutorial was written by me on 10/23/11.
Any resemblance to other tutorials is a coincidence.
Click on image to view full size.
Supplies:
1) Tube of Choice. I'm using one called "Devilina 2" by Alex Prihodko. This is a PTU tube, which can be purchased at PFD.
2) Scrapkit of Choice. I'm using the PTU kit Avril by Addictive Pleasures, which you can get at dreams-n-digital.
3) Tamie's Template, available here.
4) Mask of choice. I used WSL#116 available here.
5) Font of Choice
Plugins:
1) Eye Candy 4 Glass
2) Eye Candy 4 Gradient Glow
3) Xero Porcelain
Let's get Started....
1) Open Template. Duplicate (shift d) and close original.
2) Delete Copyright Layer
3) Change Canvas Size to 800 x 800. (You can resize your tag later, but to give us a little working room on the sides).
4) Hide your background layer for now.
5) Open Paper 6, copy and paste as new layer above the background Layer. Apply your mask of choice. Merge mask group. Add Drop Shadow.
6) Select Raster Layer 4. Select All, Float, Defloat. Open paper 4 copy and paste as new layer. Resize by 80%. Selections Invert, delete. Select none.
7) Select Raster Layer 4 Again. Select All, Float, Defloat. Selections Modify, Expand by 4. Add new Raster layer. Flood fill with following Gradient: Foreground #f457f9 and Background #3f206e (or choose colors that match your tube if not using the same one). Gradient style: Linear, Angle 45, Repeats 3. Select none. Add Noise Uniform 40, Monochrome checked. Apply drop shadow of choice.
8) Delete Original Raster Layer 4.
9) Repeat steps 6-8 on Raster Layer 3.
10) Repeat Steps 6-8 again on Raster Layer 1, using paper2 (don't need to resize paper).
11) Repeat 6-7 again on Raster Layers 5 & 6, using paper7 (don't need to resize paper).
12) Select Raster Layer 2. Select All, Float, Defloat. Open paper 9 copy and paste as new layer. Selections Invert, delete. Select none. Repeat on Layer 8.
13) Select Raster Layer 7. Flood fill with our gradient. Add Noise Uniform 40, Monochrome checked. Add drop shadow. Repeat on Layer 9.
14) Select Raster Layer 8. Select All, Float, Defloat. Open close up tube. Copy and paste as new layer (I resized by 60%). Selections Invert, Delete. Duplicate. On top layer apply Xero, Porcelain. Change blend mode to Overlay and lower opacity to 55. On bottom layer, add drop shadow of choice.
15) Delete Layer 8.
16) Repeat Steps 14-15 on Layer 2 (if desired, I left off on layer 2) and Layer 6.
17) Delete Raster 5.
18) Select Raster 10, Select All, Float, Defloat. Open paper 5, copy and paste as new layer. Selections Invert, Delete. Select none. Apply Eye Candy Glass with default settings. Delete Raster 10. Merge down our layer with Raster 15. Apply Gradient Glow 3, 0, 100, Medium white to merged layers.
19) Select Raster 11. Select All, Float, Defloat. Open paper 2, copy and paste as new layer. Selections Invert, Delete. Select none. Apply Eye Candy Glass with default settings. Delete Raster 11. Merge down Raster 5 with our layer. Apply Gradient Glow 3, 0, 100, Medium Black to merged layers.
20) Repeat step 18 on Raster 12, Merging it with Raster 17.
21) Repeat step 19 on Raster 13, Merging it with Raster 18.
22) Repeat step 18 on Raster 19, Merging it with Raster 20.
23) Open Main tube, copy and paste as new layer. Select the bottom circle filled gradient layer. Select all, float, defloat. Selection modify, contract by 4. Selections Invert. Reselect tube layer and use eraser tool to remove the parts at the bottom that stick over the gradient frame fill. Select none. Duplicate tube layer. On top, apply Xero Porcelain. Lower opacity to 57. On bottom, apply drop shadow of choice.
24) Bring your word art layers to the top and arrange to your liking.
25) Open sparkles. Copy and paste as new layer above our mask layer at the top left. Duplicate, Image mirror. Merge down. Duplicate, Image flip. Merge down.
26) Open glitter. Copy and paste as new layer above our mask layer at the top right. (Under the sparkles). Duplicate, Image Mirror, Image flip. Merge down. Duplicate, Image mirror. Merge down.
27) Open crown, copy and paste as new layer. I put mine where it looked like she was wearing it in the close up square. Add drop shadow. Change blend mode to hard light.
28) Open hearts, copy and paste as new layer. Resize by 50%. Add drop shadow.
29) Open glass brad, copy and paste as new layer. Resize by 30%. Add drop shadow.
30) Open decor, copy and paste as new layer. Resize by 50%. Add drop shadow. Duplicate as desired and arrange where you want.
31) Resize your tag.
32) Add copyright information and your name. Export png.
Thanks for trying my tut!
Saturday, October 22, 2011
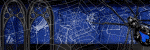
Starlight Dreams

This tutorial was written by me on 10/22/11.
Any resemblance to other tutorials is a coincidence.
Click on image to view full size.
Any resemblance to other tutorials is a coincidence.
Click on image to view full size.
Supplies:
1) Tube of Choice. I'm using one called "Dreams & Butterflies" by Anna Marine. This is a PTU tube, which can be purchased at CDO.
2) Scrapkit of Choice. I'm using the PTU kit Starlight Fantasy by Created by Jill, purchased at SATC.
3) VixBigMask018, available here (Optional for tag1)
4) Font of Choice.
Plugins:
1) Eye Candy Gradient Glow
2) Xero Radiance
3) AAA Frames, Foto Frame (optional for tag2)
Let's get Started....
1. Open New Canvas, transparent 750x700.
2. Open Mask. Minimize it.
3. Open paper 9, copy and paste as new layer. Apply our mask to the layer. Merge mask group.
4. Open frame 5, copy and paste as new layer. Resize by 70%. Apply Gadient Glow with settings 5,0,100, Medium Black.
5. Use magic wand, click inside the frame layer. Selections Modify, expand by 8. Open paper window background. Copy and paste as new layer. Resize by 70%. Selections Invert, delete. Select none. Drag layer under the frame. Change blend mode to Luminance(L).
6. Open main tube, copy and paste as new layer. Select Frame Layer, Select all, float, defloat, selections invert. Click back on our tube layer and use eraser tool to erase the overhanging parts of our tube at the bottom.
7. Duplicate tube layer. On top layer, apply Xero, Radiance. Change blend mode to soft light and lower the opacity to 61. On bottom layer, add drop shadow 2, 2, 50, 20, White.
8. Open Sparkle trail. Copy and paste as new layer just above our mask layer. Resize by 90%. Duplicate, Image Mirror, Image Flip. Merge two layers together. Duplicate. Image Mirror. Merge down. Duplicate. Image free Rotate, Left 45. Duplicate. Image free Rotate, Left 45. Duplicate. Image free rotate Left 45.
9. Open Stars 1. Copy and paste as new layer. Resize by 50% and place at the top left. Duplicate, Image mirror. Take your eraser tool and erase the one strand that is really close to the other in the middle. Merge layers together. Add drop shadow: 2, 2, 50, 5, White. Duplicate, Image flip.
10. Open glitter 1, copy and paste as new layer. Add previous drop shadow.
11. Open fantasy butterflies. Colorize Hue 172, Saturation 255. Copy and paste as new layer. Resize by 80%. Then again by 80%. Arrange at the left. Add previous drop shadow. Duplicate, Image mirror. Free rotate, Left 45.
12. Flood fill bottom (blank) raster layer with black.
13. Resize by 91%. Merge visible. For tag version 1, Apply our VixBigMask and merge mask group. For tag version 2, Apply AAA Foto frame with settings: 10,23,0,1,0,0,0,100.
14. Add your copyright + name and export .png or .jpg.
Thanks for trying my tut!

Version 2
Finding Neverland

This tutorial was written by me on 10/22/11.
Any resemblance to other tutorials is a coincidence.
Click on image to view full size + animation.
Any resemblance to other tutorials is a coincidence.
Click on image to view full size + animation.
Supplies:
1) Tube of Choice. I'm using one called "Early Visit" by Rachael Tallamy. This is a PTU tube, which can be purchased at Up Your Art.
2) Scrapkit of Choice. I'm using the PTU kit Finding Neverland by Created by Jill, purchased at SATC.
3) Vix Mask76 available here.
4. Fairyglitter animation by Missy, here.
4) Font of Choice.
Let's get Started....
1. Open New Canvas, transparent 750x700.
2. Flood Fill Background layer color of choice (I used black. Since we're using a mask with transparency, we need a solid background color when we go to animate).
3. Open Paper 7, copy and paste as new layer. Apply our mask. Merge Mask group.
4. Open Frame 4, copy and paste as new layer. Add drop shadow of choice. Use magic want and click inside the frame, Selections Modify, expand 20. Add new raster layer. Flood fill black. Select none. Drag below our mask group. Use eraser tool to erase the bits of the mask that hang below our frame.
5. Open Fantasyhouse, copy and paste as new layer above our frame and to the left side. Add drop shadow of choice.
6. Open flowers, copy and paste as new layer above our frame. Image resize 50%. Image mirror. Arrange to the bottom right of the frame. Add drop shadow of choice. Duplicate, Image mirror.
7. Open tube. Copy and paste as new layer above the others along the bottom of the frame. Add drop shadow of choice.
8. Open word art, copy and paste as new layer. Arrange above our tube and the door to the house. Add drop shadow of choice.
9. Open sparkles. Copy and paste as new layer. Arrange so most are in the trees of our mask layer. Then click on the frame layer and use magic wand, select inside of frame. Selections Modify, Expand by 10. Then click back on sparkles layer, selections invert, delete. Select none.
10. Open lights, copy and paste as new layer. Resize by 50%. Add drop shadow of choice.
11. Open flower swirl. Copy and paste as new layer. Image flip. Arrange at the top right of the frame. Add drop shadow of choice. Use eraser brush to remove the parts that go into the middle of our tag. Duplicate, Image Mirror. Duplicate Image Flip. Drag underneath our main tube but keep above the frame. Duplicate again and drag a bit more over to the right. Use eraser tool to remove anywhere it's unwanted on any of these layers.
12. Send our word art layer to the top.
13. Open window. Resize by 20%. Copy and paste as new layer, underneath our main tube layer but above the flowers and arrange at bottom right. Add drop shadow of choice.
14. Crop your tag (I had excess room at the bottom. Resize if desired).
15. Add your copyright information + name (if you're going to make more than 1 tag, just do your copyright info now. That way you can save a blank animated tag and make it easier on yourself to add additional names).
Ok, Let's animate...
16) Open the animation in Animation shop.
17) Back in PSP, Edit copy, merged.
18) Back in animation shop, paste as new animation.
19) Right click on our tag and click Insert Frames, From Empty. 14, 2, 10, carry forward contents of preceding frame. Leave all frames selected.
20) Click on the fairy glitter animation. Ctrl A. Make sure you are on Frame 1 of it, and drag over to Frame 1 of our tag and place the leaves where you want them. I did sort of in the bottom middle of the left most lantern.
21) View animation. If you're happy with it, Save as a .mng so you can add your name and others (if you didn't already had your name). If you have your name already, go ahead and save as .gif.
22) If you need to add a name, go back to the tag in animation shop. Add your name as you normally would. Then when happy with it, copy just that layer and come into Animation shop. Paste as a new image. Repeat step 19 above on your name, so that it has 15 frames. Then Make sure to select all layers on the name, and all layers on the tag, and drag from Frame 1 of name to Frame 1 of tag and release where you want your name to be. View animation and if happy, save your .gif.
Thanks for trying my tut!
Subscribe to:
Posts (Atom)
Grab My Blinkie


